[AI] YOLO v3 darknet - 이미지 여러개 순차적으로 처리하기
YOLO v3 darknet detect multiple images.
저번 포스팅에서 YOLO v3 darknet의 main source code를 살펴보았는데요, "detector" command는 동영상을 처리하게 되고, "detect" command는 단일 이미지를 처리한다는 것을 알았습니다.
https://wendys.tistory.com/143
[AI] 젯슨 나노(Jetson Nano) darknet YOLO v3 설치 및 샘플 돌려보기
젯슨 나노 (jetson nano) darknet 신경망 오픈소스 프로젝트 YOLO v3 설치하기 https://pjreddie.com/darknet/ Darknet: Open Source Neural Networks in C Nightmare Use Darknet's black magic to conjure ghost..
wendys.tistory.com
여러개의 이미지를 테스트하기위해서는 ./darknet detect를 처리할 때 이미지 경로를 주지 않도록 하여 아래와 같이 노가다 테스트가 가능합니다.
./darknet detect cfg/yolov3.cfg yolov3.weights
...


Enter Image Path: images/1.jpg
...

Enter Image Path: images/2.jpg
...

Enter Image Path: images/3.jpg
...
YOLO v3 여러개 이미지 순차적으로 처리하기
샘플만 돌려본상태라면 테스트할 때는 괜찮지만, 실제 개발을 하게 되면 여러 이미지를 어떻게 처리해야 할 고민이 필요합니다. 그리고 처리된 이미지의 결과를 소켓통신을 이용하여 서버로 전달하거나, 파일로 저장하여 다른곳에서 가져다 사용하기 위해선 어떻게 하면 될까요??
간단한 코드 추가를 통해 테스트를 한번 해보겠습니다.
기존 소스코드에 응용을 하면 될텐데요 지금 해보려는 기능은 한번 실행으로 여러 개의 이미지를 순차적으로 처리를 해보려 합니다. 일단 직접 처리할 command를 하나 추가하도록 합니다.
darknet.c
int main(int argc, char **argv) {

    ...

    //
    // command.
    //

    if (0 == strcmp(argv[1], "mycommand")){ // option에 하나 추가하도록 합니다.
        float thresh = find_float_arg(argc, argv, "-thresh", .24);
		int ext_output = find_arg(argc, argv, "-ext_output");
        mycommand_detector("cfg/coco.data", argv[2], argv[3], thresh, 0.5, 0, ext_output, 0, NULL, 0);
    } else if (0 == strcmp(argv[1], "average")){
        average(argc, argv);
    }
    ...
"detect" 명령어를 하나 복사해서 새로운 command를 추가합니다. "detect"에서 사용된 test_detector함수는 detector.c에 구현되어있으니 복사해서 구현할 수 있습니다.
저렇게 추가가 되면 아래와 같은 커맨드를 입력하게되면 내가 직접 만든 함수가 호출되게 됩니다.
./darknet mycommand cfg/yolov3.cfg yolov3.weights
detector.c
기존 코드에서 많이 변경되지는 않고 간단하게 몇가지만 변경되었습니다.
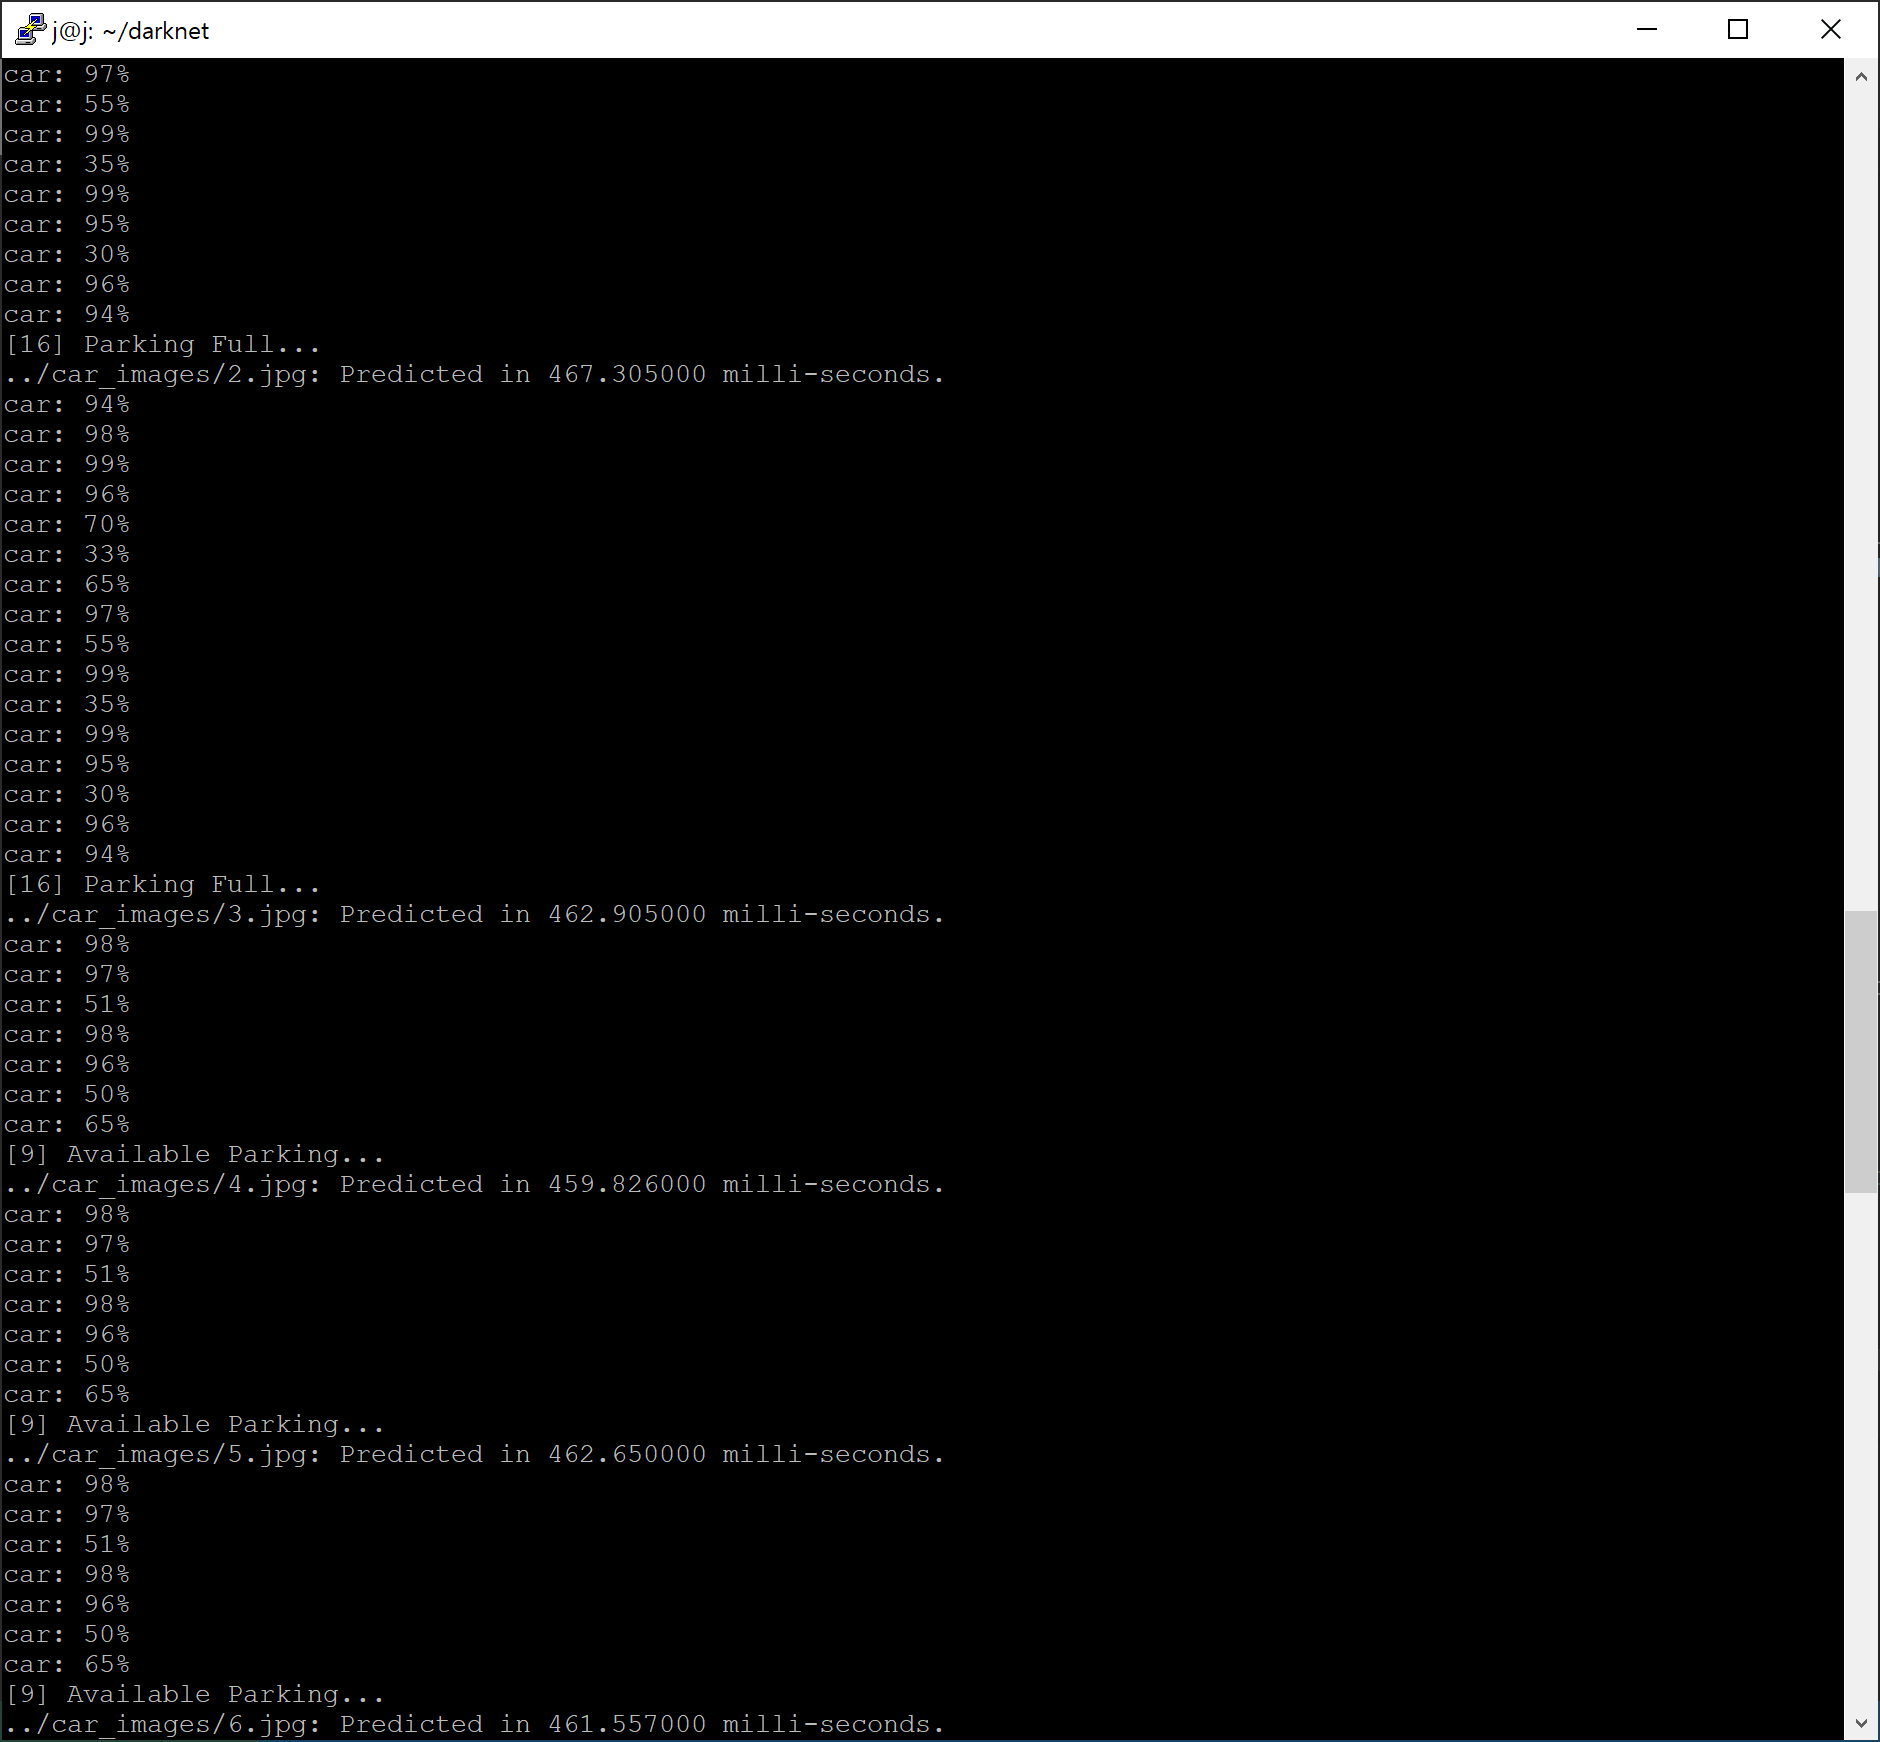
initialize source code와 finalyze source code는 그대로 가져다 쓰고, while loop 안에서 이미지를 순차적으로 처리한 뒤 draw_detections_v3 함수를 호출하여 검출된 상세 영역을 처리하는 코드입니다.
아래 코드를 그대로 사용하는 경우 이미지 파일은 ../test_images/ 경로에 1.jpg ~ 32.jpg를 넣어놓고 테스트를 해보면 되고, readdir api를 사용하여 폴더 내 모든 파일을 순회하도록 구현해도 좋습니다.
void mycommand(
    char *datacfg,
    char *cfgfile,
    char *weightfile,
    float thresh,
    float hier_thresh,
    int dont_show,
    int ext_output,
    int save_labels,
    char *outfile,
    int letter_box
    ) {

    //
    // initialize.
    //

    list *options = read_data_cfg(datacfg);
    char *name_list = option_find_str(options, "names", "data/names.list");
    int names_size = 0;
    char **names = get_labels_custom(name_list, &names_size); //get_labels(name_list);

    image **alphabet = load_alphabet();
    network net = parse_network_cfg_custom(cfgfile, 1, 1); // set batch=1
    if (weightfile) {
        load_weights(&net, weightfile);
    }
    fuse_conv_batchnorm(net);
    calculate_binary_weights(net);
    if (net.layers[net.n - 1].classes != names_size) {
        printf(" Error: in the file %s number of names %d that isn't equal to classes=%d in the file %s \n",
            name_list, names_size, net.layers[net.n - 1].classes, cfgfile);
        if (net.layers[net.n - 1].classes > names_size) getchar();
    }
    srand(2222222);
    char buff[256] = {};
    char *input = buff;
    char *json_buf = NULL;
    int json_image_id = 0;
    FILE* json_file = NULL;
    if (outfile) {
        json_file = fopen(outfile, "wb");
        char *tmp = "[\n";
        fwrite(tmp, sizeof(char), strlen(tmp), json_file);
    }
    int j;
    float nms = .45;    // 0.4F

    //
    // detect images.
    //

    int i = 0;

    while (1) {

        i++;
        if(i > 32) {
            break;
        }

        sprintf(input, "../test_images/%d.jpg", i);

        image im = load_image(input, 0, 0, net.c);
        image sized;
        if(letter_box) sized = letterbox_image(im, net.w, net.h);
        else sized = resize_image(im, net.w, net.h);
        layer l = net.layers[net.n - 1];

        float *X = sized.data;

        double time = get_time_point();
        network_predict(net, X);

        printf("%s: Predicted in %lf milli-seconds.\n", input, ((double)get_time_point() - time) / 1000);

        int nboxes = 0;
        detection *dets = get_network_boxes(&net, im.w, im.h, thresh, hier_thresh, 0, 1, &nboxes, letter_box);
        if (nms) {
            if (l.nms_kind == DEFAULT_NMS) do_nms_sort(dets, nboxes, l.classes, nms);
            else diounms_sort(dets, nboxes, l.classes, nms, l.nms_kind, l.beta_nms);
        }

        //
        // draw detections.
        //

        draw_detections_v3(im, dets, nboxes, thresh, names, alphabet, l.classes, ext_output);

        free_detections(dets, nboxes);
        free_image(im);
        free_image(sized);

        if (!dont_show) {
            wait_until_press_key_cv();
            destroy_all_windows_cv();
        }

    }

    if (outfile) {
        char *tmp = "\n]";
        fwrite(tmp, sizeof(char), strlen(tmp), json_file);
        fclose(json_file);
    }

    //
    // finalyze
    //

    free_ptrs((void**)names, net.layers[net.n - 1].classes);
    free_list_contents_kvp(options);
    free_list(options);

    const int nsize = 8;
    for (j = 0; j < nsize; ++j) {
        for (i = 32; i < 127; ++i) {
            free_image(alphabet[j][i]);
        }
        free(alphabet[j]);
    }
    free(alphabet);

    free_network(net);
}

while loop를 돌기전에 socket을 초기화하여 결과를 네트워크로 전송을 할 수도 있고, file을 open 하여 파일로 내용을 저장할 수도 있습니다. 위에 이미지처럼 현재 몇 개의 오브젝트가 검출되었는지, 어떤 이름의 오브젝트가 검출되었는지 등 상세한 내용을 처리하고 싶다면 draw_detections_v3 함수를 분석할 필요가 있습니다.
다음 포스팅에서는 draw_detections_v3 함수를 분석해보겠습니다.
'⌨ DEVELOPMENT > AI' 카테고리의 다른 글
| [AI] 젯슨 나노(Jetson Nano) 초간단 리눅스 웹서버 구축하기 (0) | 2020.02.24 |
|---|---|
| [AI] 머신러닝의 꽃 강화학습(Reinforcement Learning) a.k.a RL (0) | 2019.12.21 |
| [AI] 머신러닝 지도학습(Supervised Learning) , 비지도학습(Unsupervised Learning) 차이점과 장단점 (8) | 2019.12.18 |
| [AI] 젯슨 나노(Jetson Nano) 명령어 하나로 최대 성능으로 사용하기 (2) | 2019.12.14 |
| [AI] jetson Nano GPU Architecture is sm=5.3 (0) | 2019.11.24 |
| [AI] jetson nano SSH가 접속이 되지 않을때 ssh-keygen -A 한방으로! (0) | 2019.11.21 |
| [AI] YOLO v3 darknet 소스 코드 분석 main은 어디있는가? (2) | 2019.11.18 |
| [AI] 젯슨 나노(Jetson Nano) darknet YOLO v3 설치 및 샘플 돌려보기 (20) | 2019.10.02 |
댓글
이 글 공유하기
다른 글
-
[AI] 머신러닝 지도학습(Supervised Learning) , 비지도학습(Unsupervised Learning) 차이점과 장단점
[AI] 머신러닝 지도학습(Supervised Learning) , 비지도학습(Unsupervised Learning) 차이점과 장단점
2019.12.18 -
[AI] 젯슨 나노(Jetson Nano) 명령어 하나로 최대 성능으로 사용하기
[AI] 젯슨 나노(Jetson Nano) 명령어 하나로 최대 성능으로 사용하기
2019.12.14 -
[AI] jetson Nano GPU Architecture is sm=5.3
[AI] jetson Nano GPU Architecture is sm=5.3
2019.11.24 -
[AI] jetson nano SSH가 접속이 되지 않을때 ssh-keygen -A 한방으로!
[AI] jetson nano SSH가 접속이 되지 않을때 ssh-keygen -A 한방으로!
2019.11.21